Solar Dyeing with Natural Dyes
One of my favorite parts of planning our summer camp programs was deciding on different natural dye projects to go with each week's theme. For our Wild Living week it made sense to focus on local plants, lichen, and mushrooms. Then the week was forecasted to have temperatures consistently in the 90s and I knew that it would be perfect for solar dyeing. Solar dyeing is great to do with kids because it can be done completely outdoors, without the need for a stove, and nothing ever gets too hot for them to touch.
We used 100% merino yarn that I had previously mordanted with alum and cream of tartar. I let the kids choose what dye materials they wanted to use. Some options were things I had previously gathered and stored such as dry dyer's polypore mushrooms, acorns from last fall and some lichen. Other material such as flowers and alder cones were harvested fresh. When it came time to set up our dye jars, no one was feeling especially scientific (myself included) so we ended up not measuring anything. I did tell the kids that we wanted about as much dye material as yarn and they were so enthusiastic about filling up jars that I'm sure we ended up with greater than a 1:1 ratio of dye material to fiber.
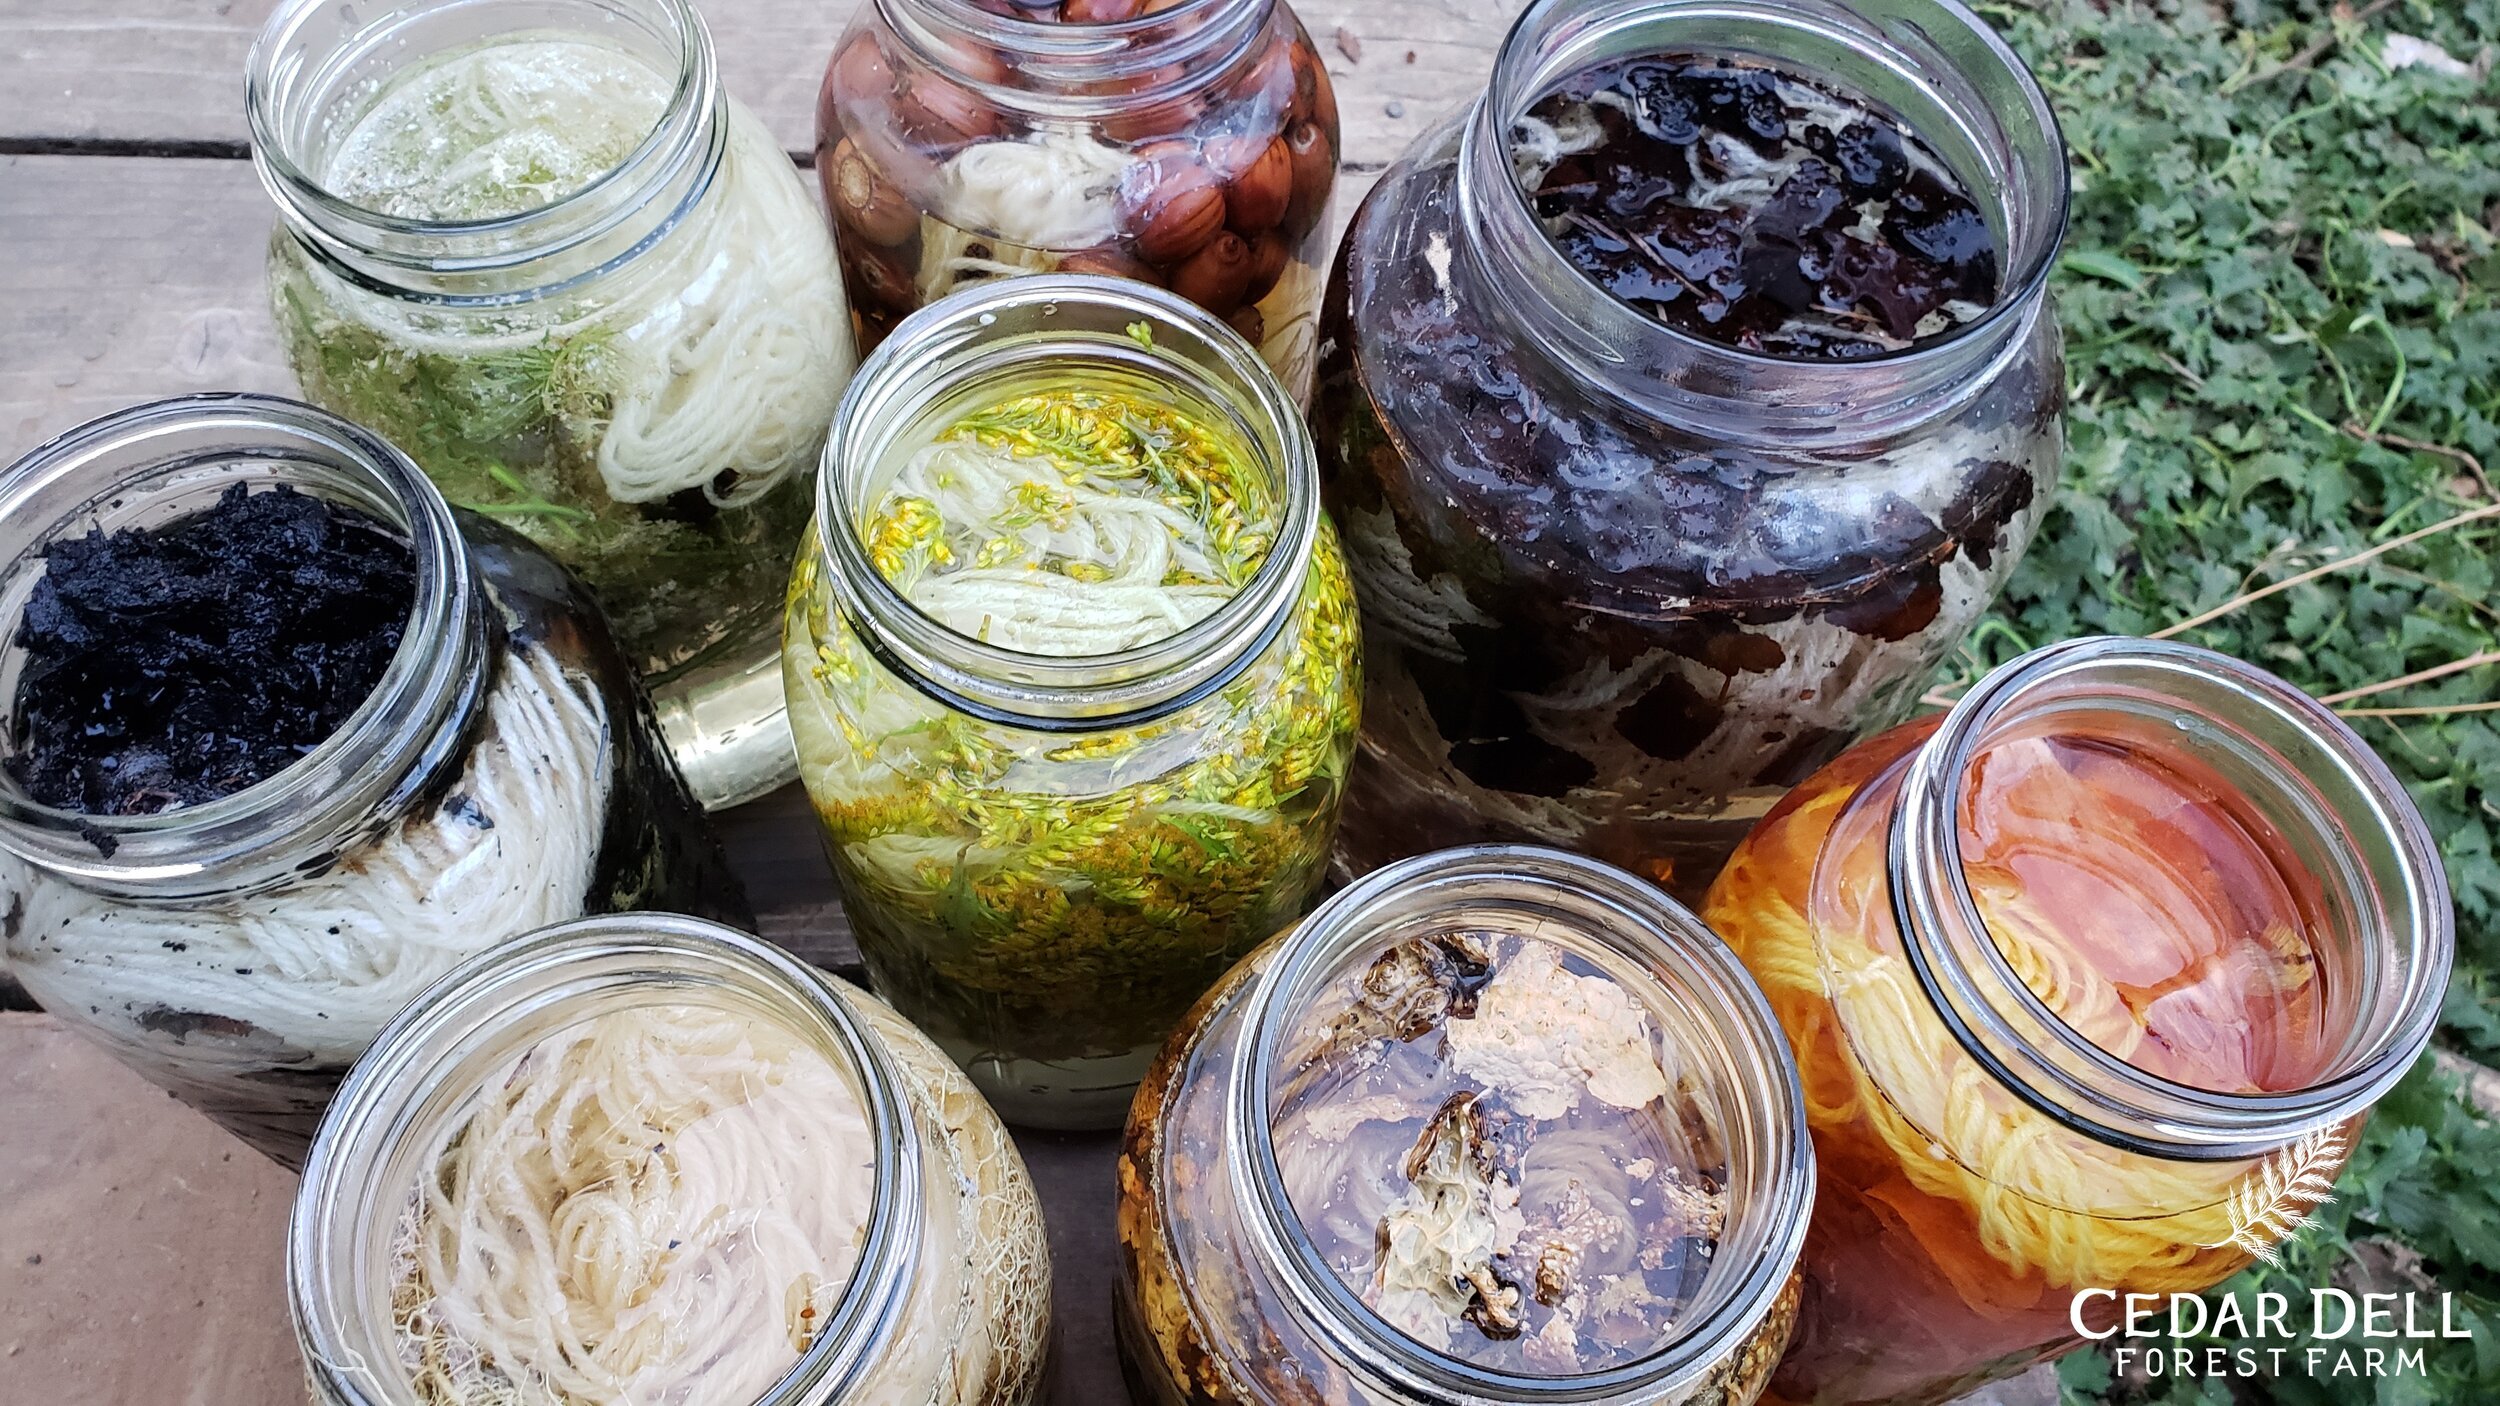
We chose a sunny place where we'd easily be able to check on them and almost all started to show a little color after only a few hours! Clockwise from the far left, the kids chose to use black walnut, queen Anne's lace flowers, acorns plus a handful of alder cones, dyer's polypore mushroom (Phaeolus schweinitzii), onion skins, lobaria lichen, usnea lichen and goldenrod flowers are in the middle.

At the end of the second day, all were showing color except the acorns/alder cones and the dyer's polypore mushroom (left two jars in the top row) even though I knew that we had enough dye material to produce stronger color. I suspected that even though the temperatures were in the high 90s it still wasn't hot enough to release the pigments so I did take those inside and heat them on the stove for about an hour. The other underwhelming color was the queen Anne's lace flowers in the far left. I knew the pale yellow could be stronger so I added a little pinch of soda ash to make the solution more alkaline and the yellow pigments really came out.
They were all left in the sun for a full third day and then the kids helped rinse and wash them.

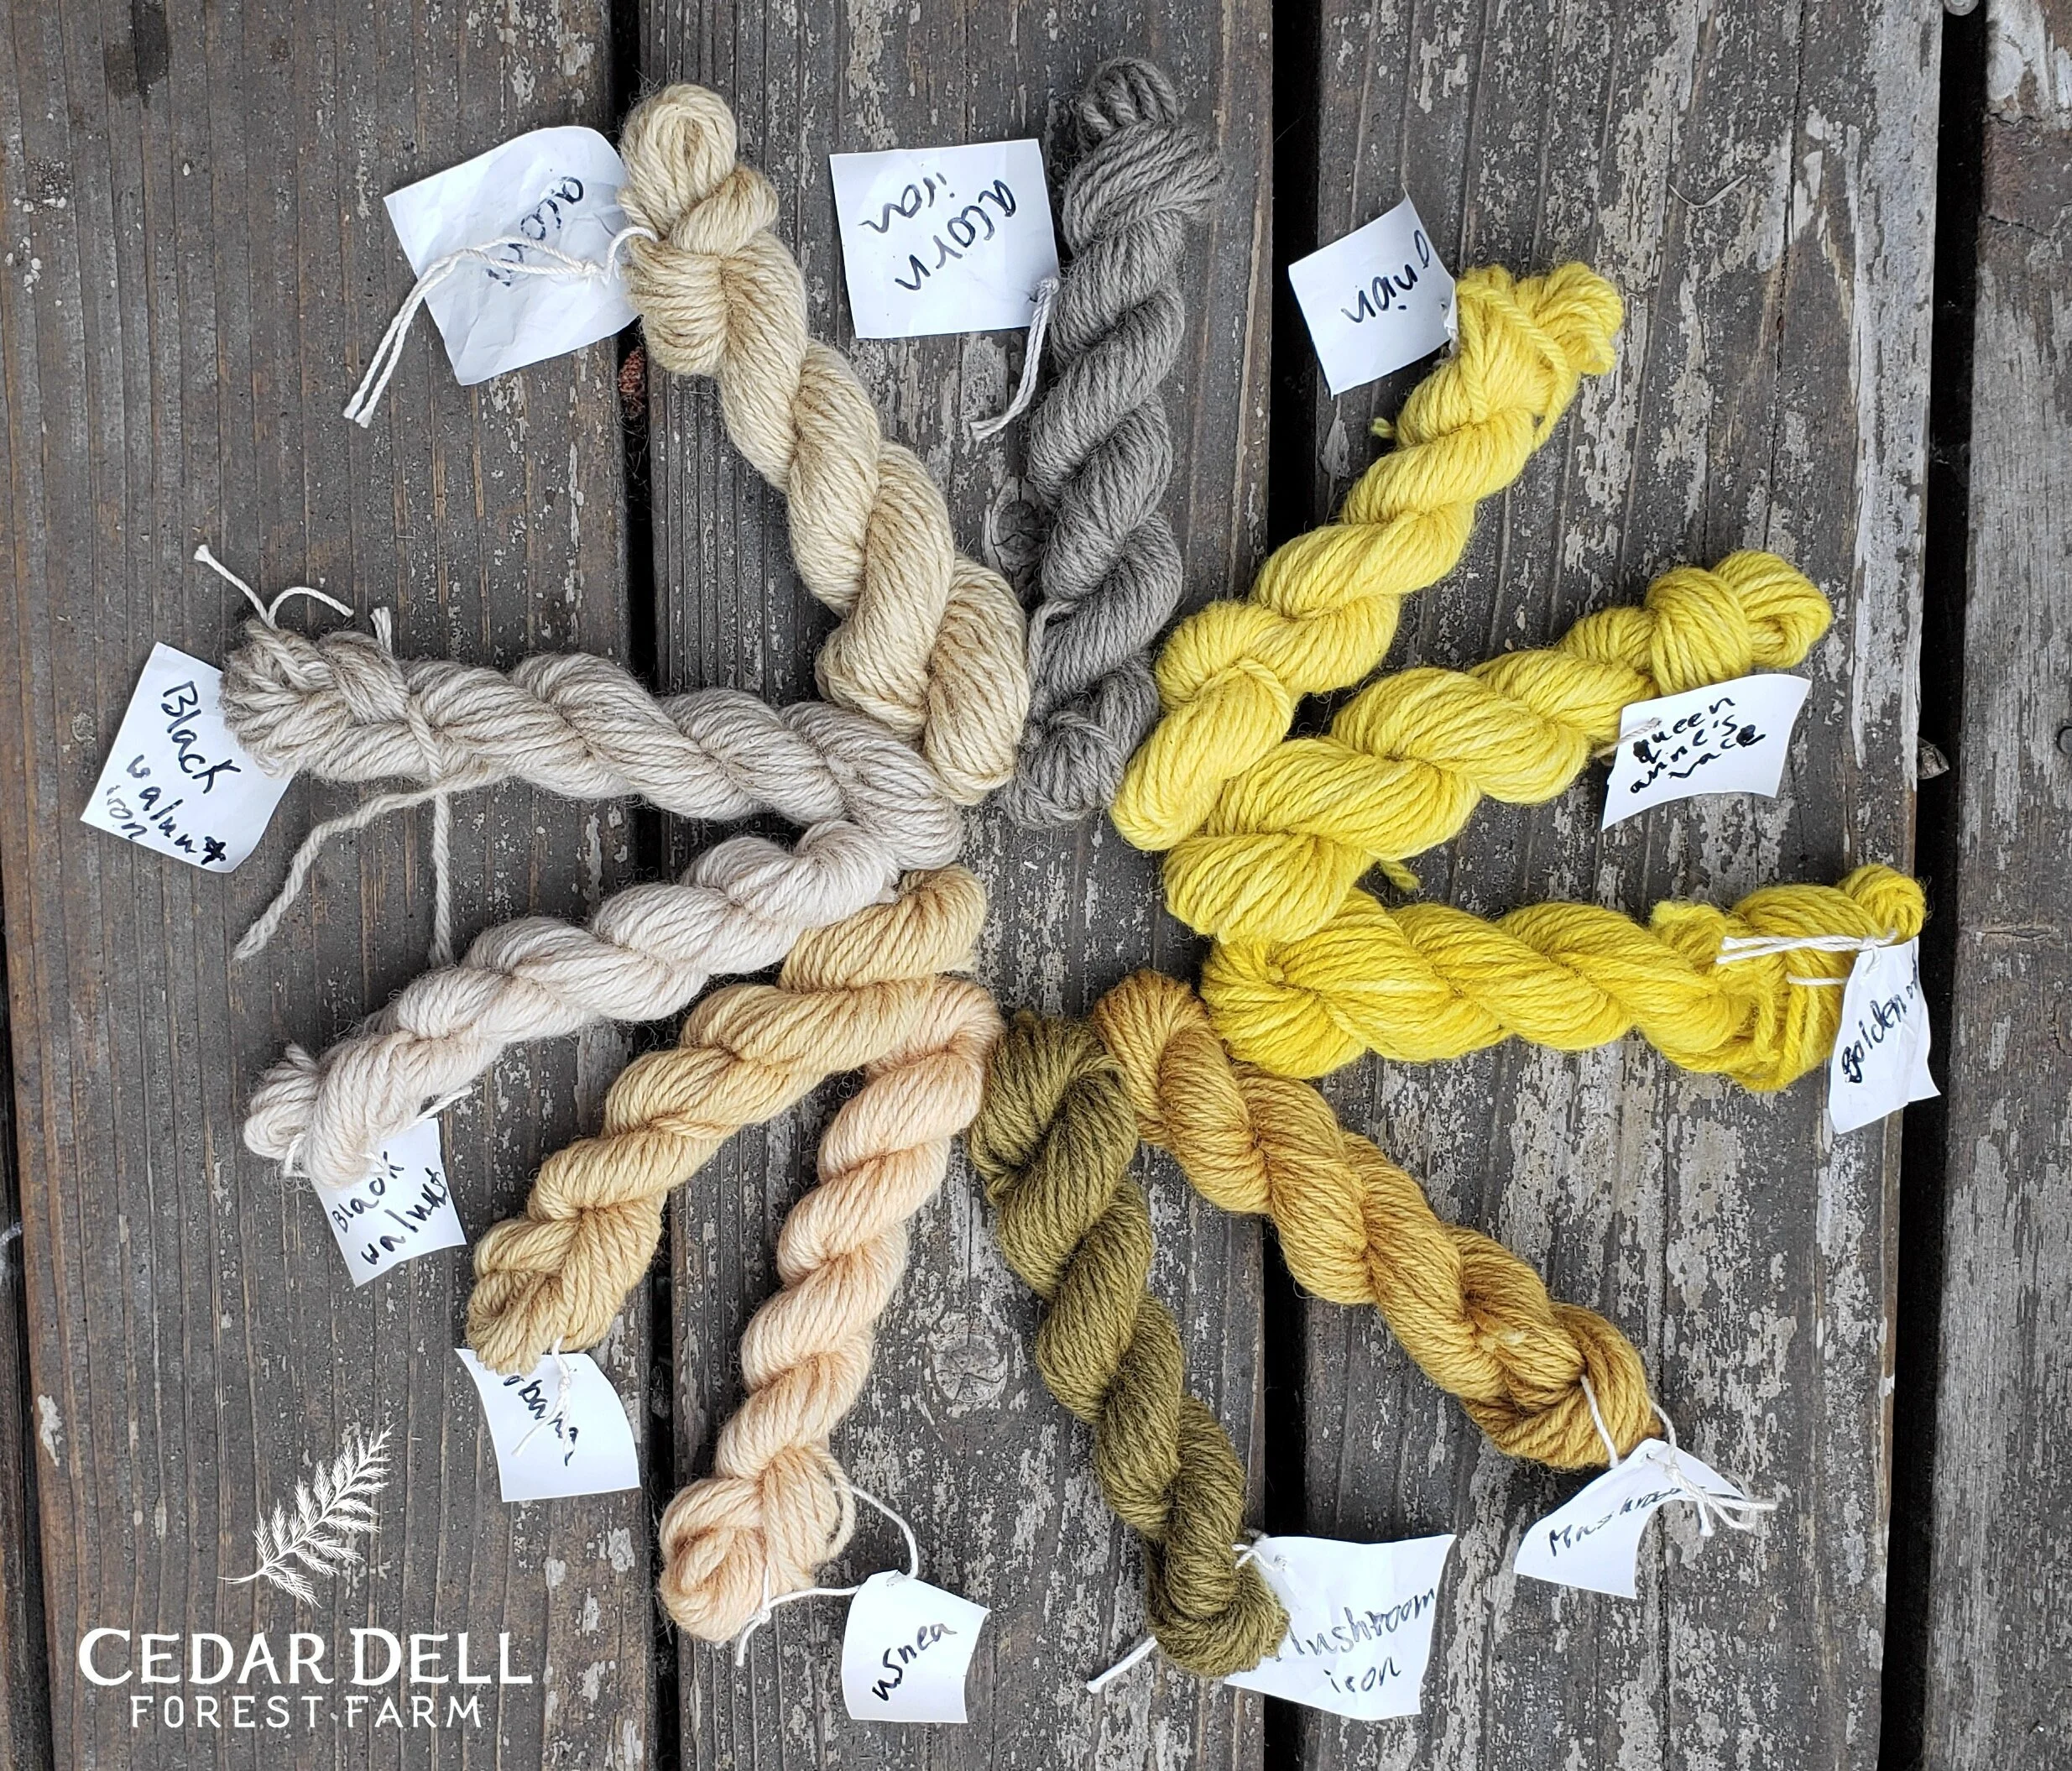
From left to right: onion skins, queen Anne's lace, goldenrod, dyer's polypore mushroom, dyer's polypore with an afterdip in iron, usnea lichen, lobaria lichen, black walnut, black walnut with an iron afterdip, acorn/alder cone, acorn/alder cone with an iron afterdip.
Final thoughts on this project - It seems that solar dyeing works best with fresh dye material that breaks down easily, such as flowers. The hard, dry things need the high heat of a stovetop simmer to release the pigments. I suspect that the lobaria lichen, which had been dried and had a leathery feel, would have given stronger color if I had heated it as well. My black walnuts were old and I had previously used them to dye fiber so I don't think there was much pigment left in them, despite the fact that they turned the water nearly black. It's always interesting that seeing color in the water doesn't always translate to color in the fiber. All in all, it was really fun for the campers to watch this process over the course of the week!
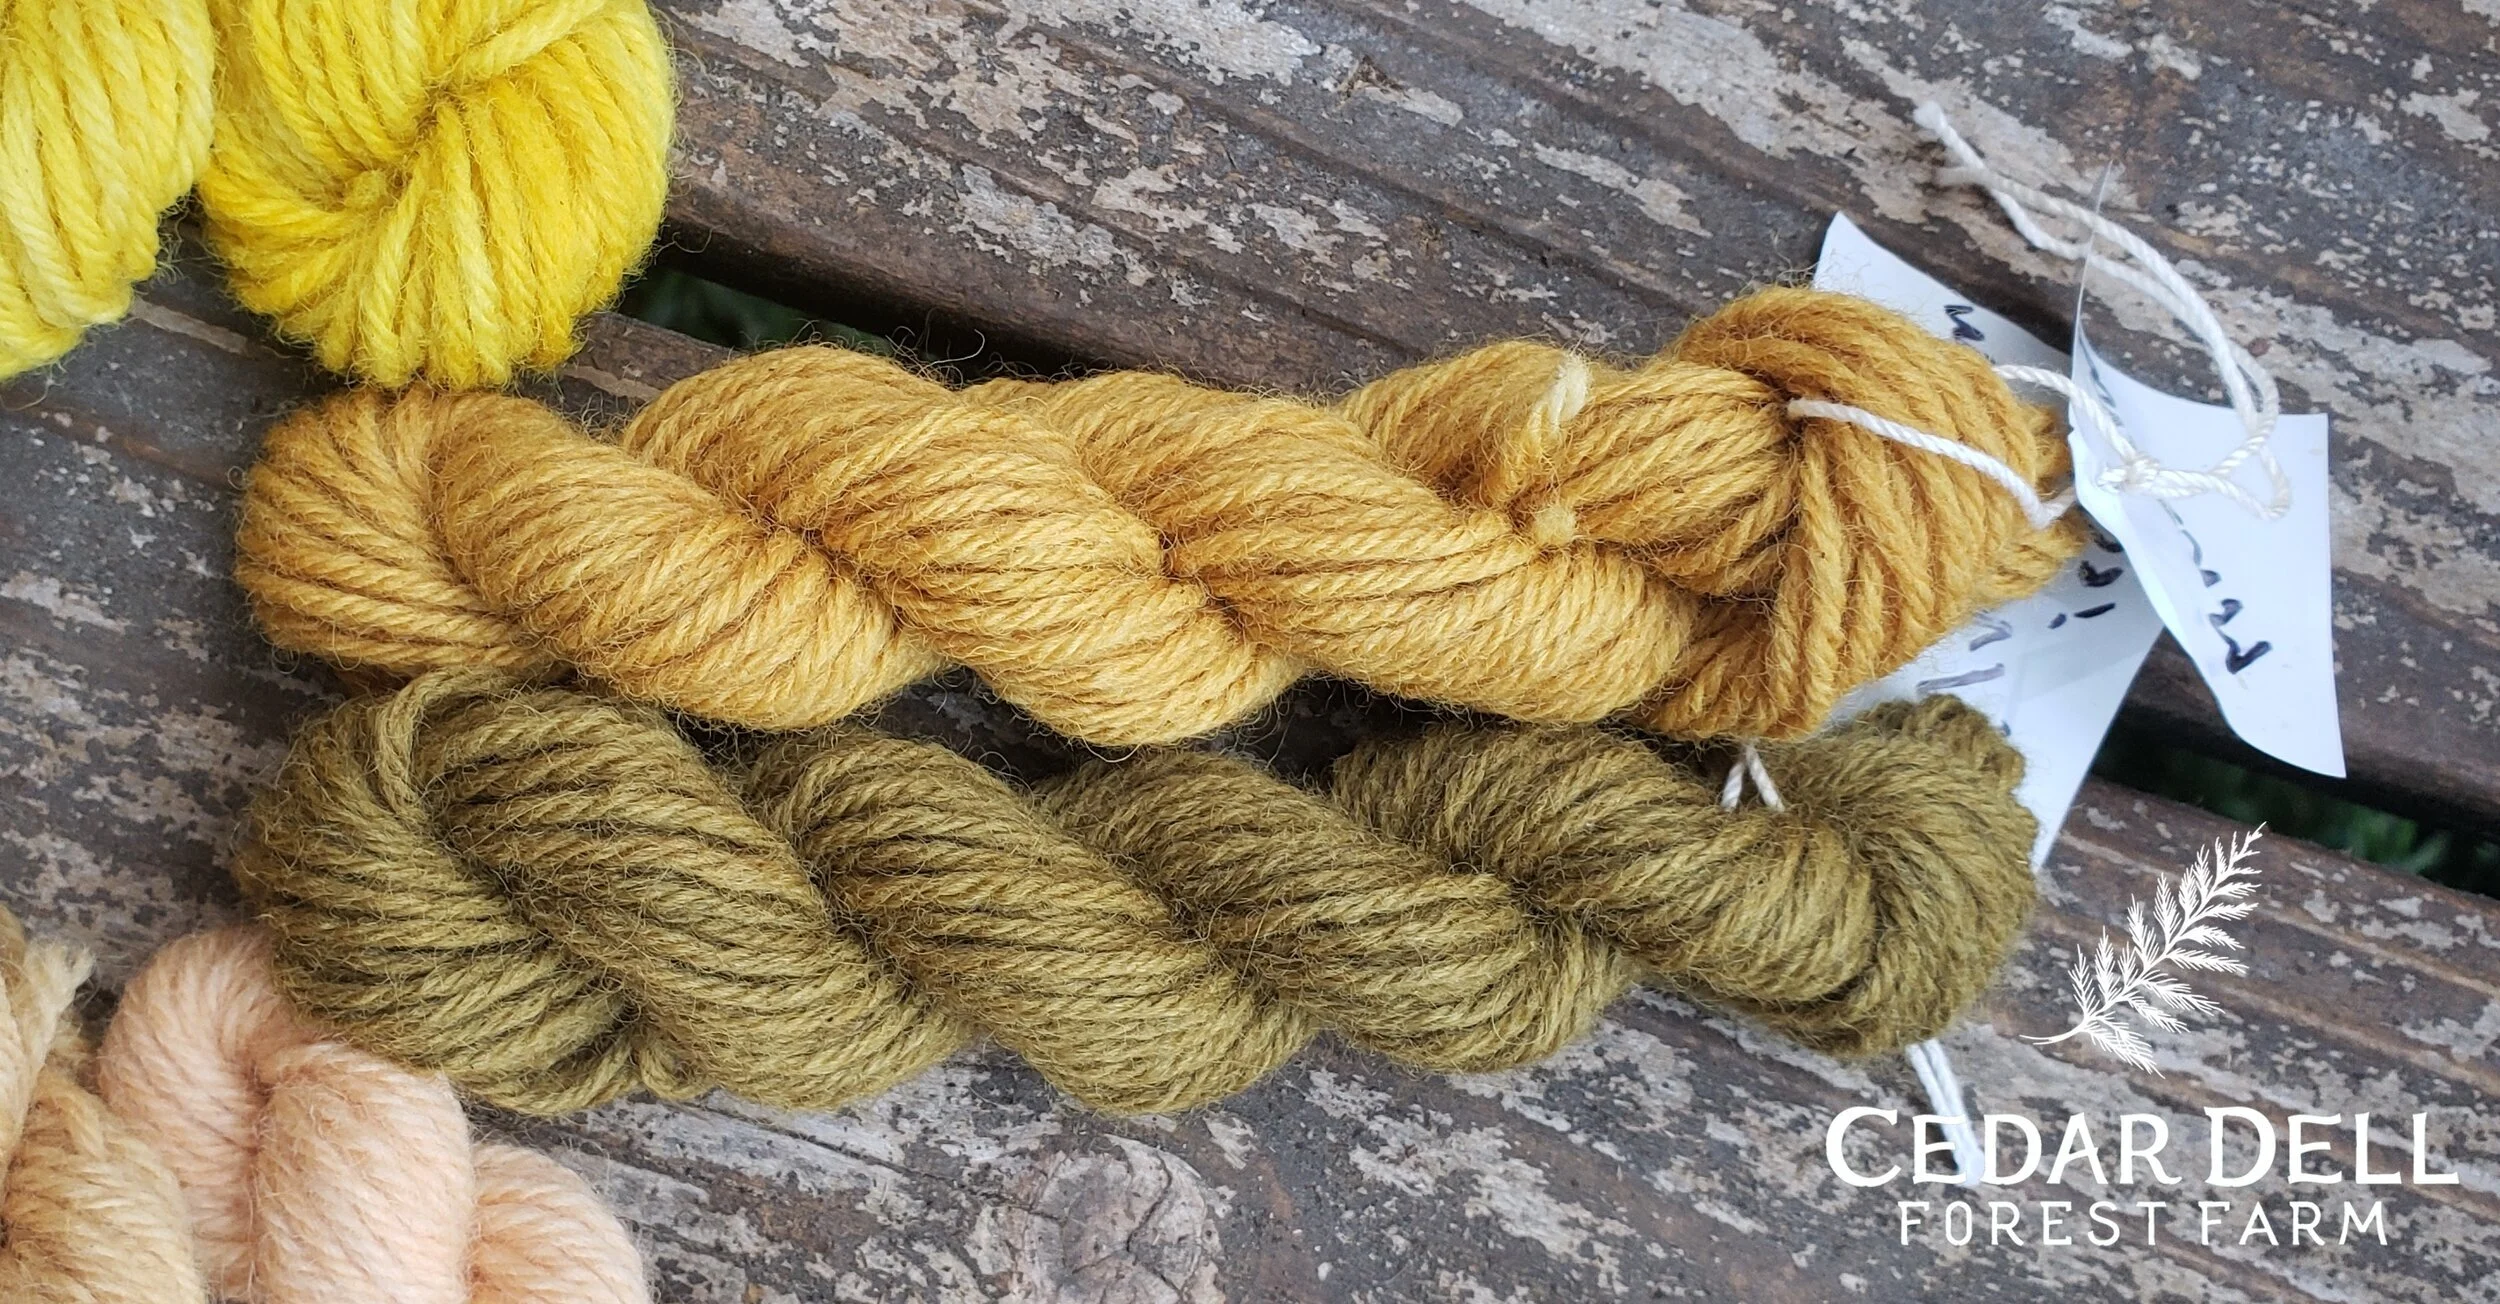
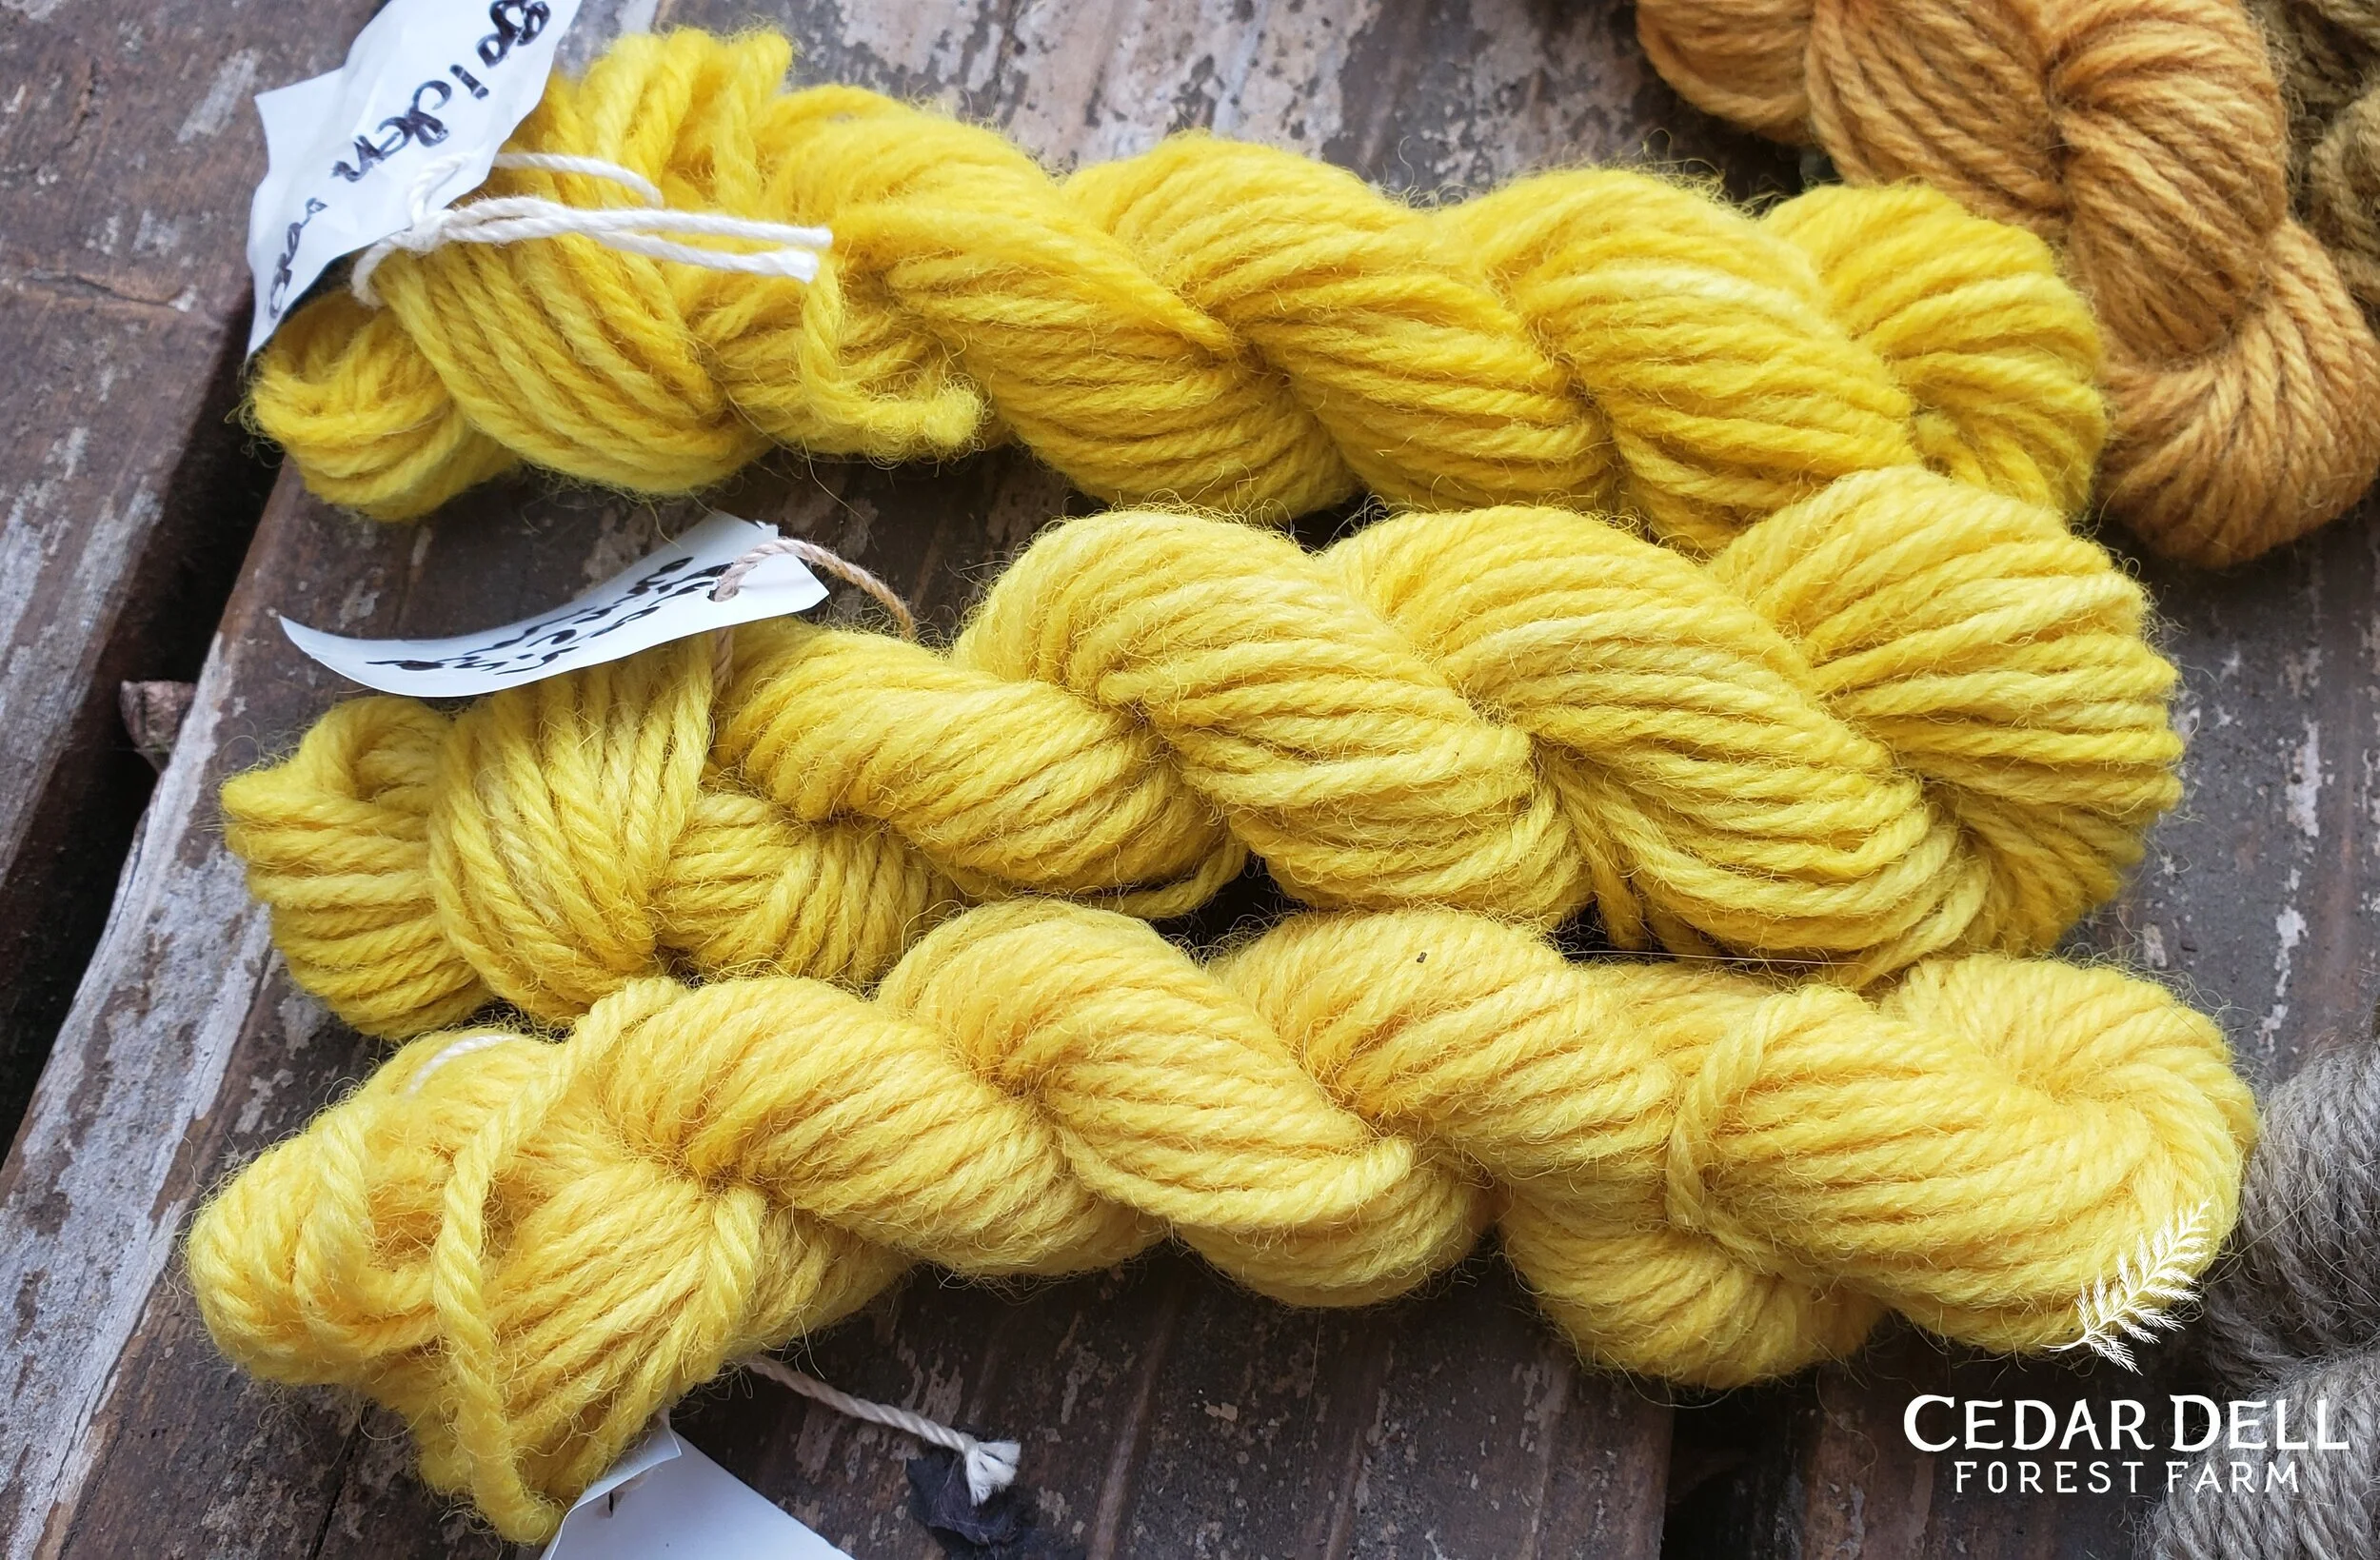
The two shades of dyer's polypore was a favorite of campers. We were all surprised that the two flowers and the onion skins ended up being such similar shades of yellow. There are some differences between the goldenrod (top), queen Anne's lace (middle) and onion (bottom) but they are very subtle.
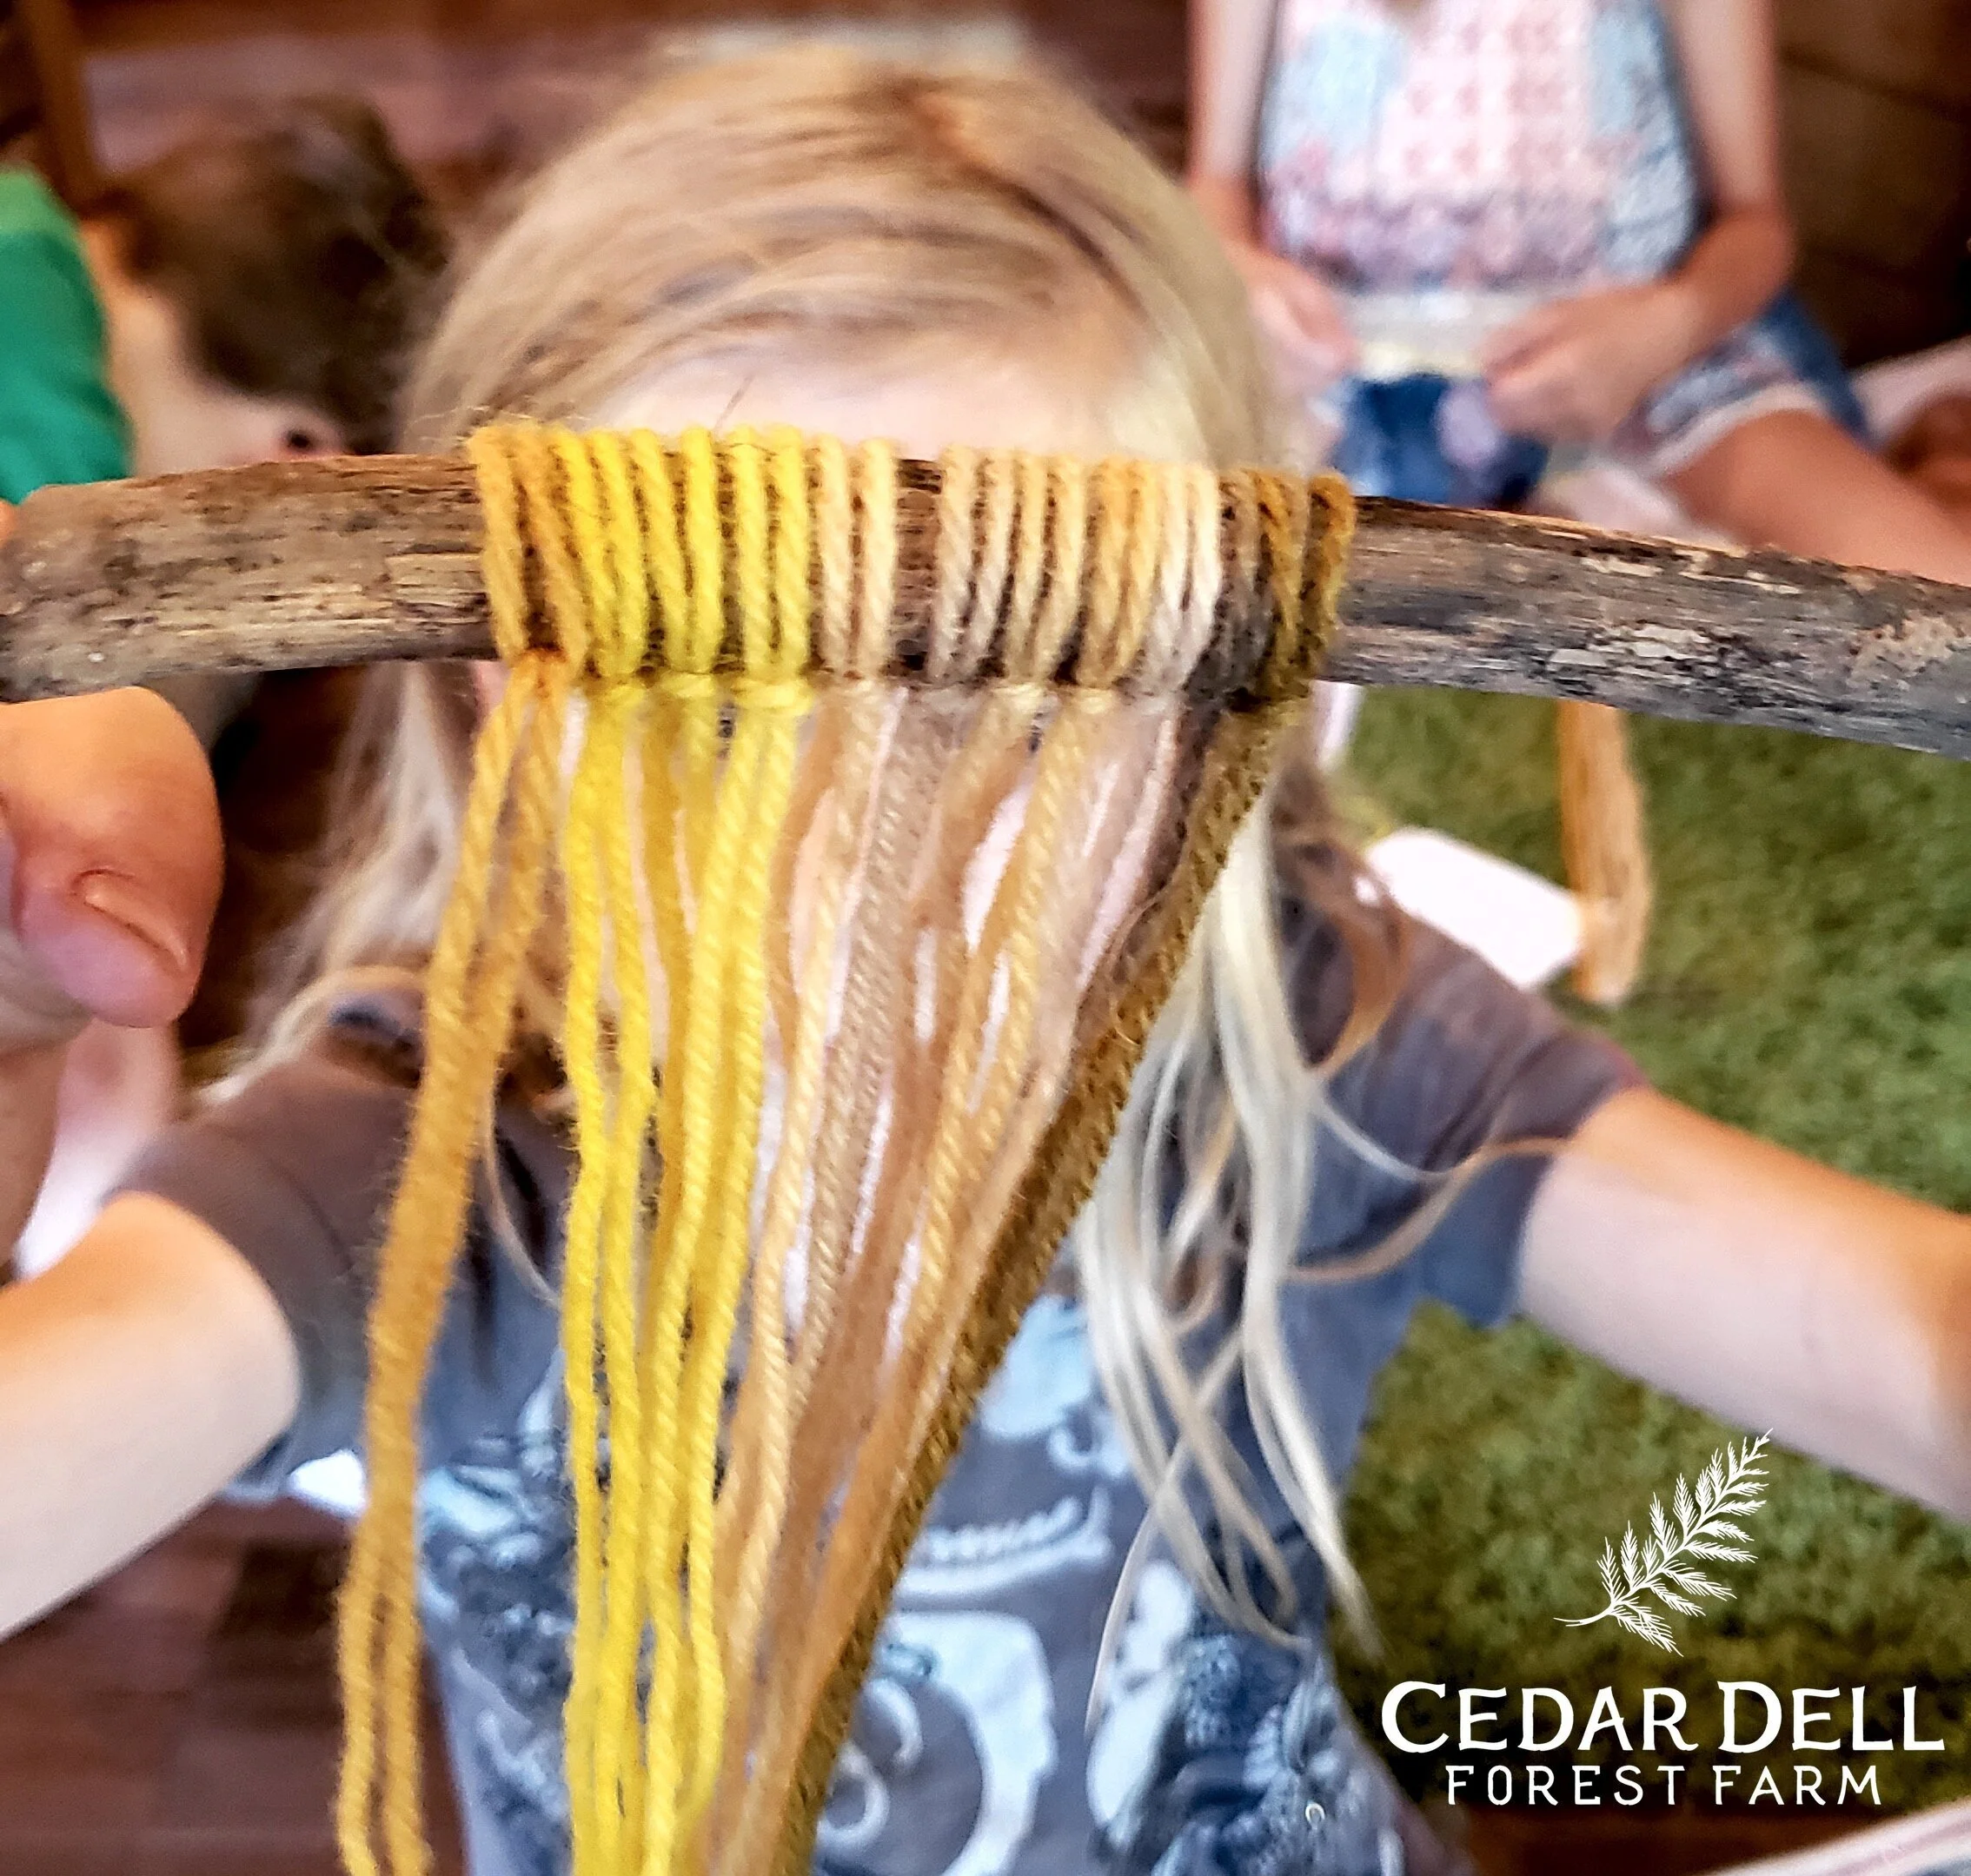
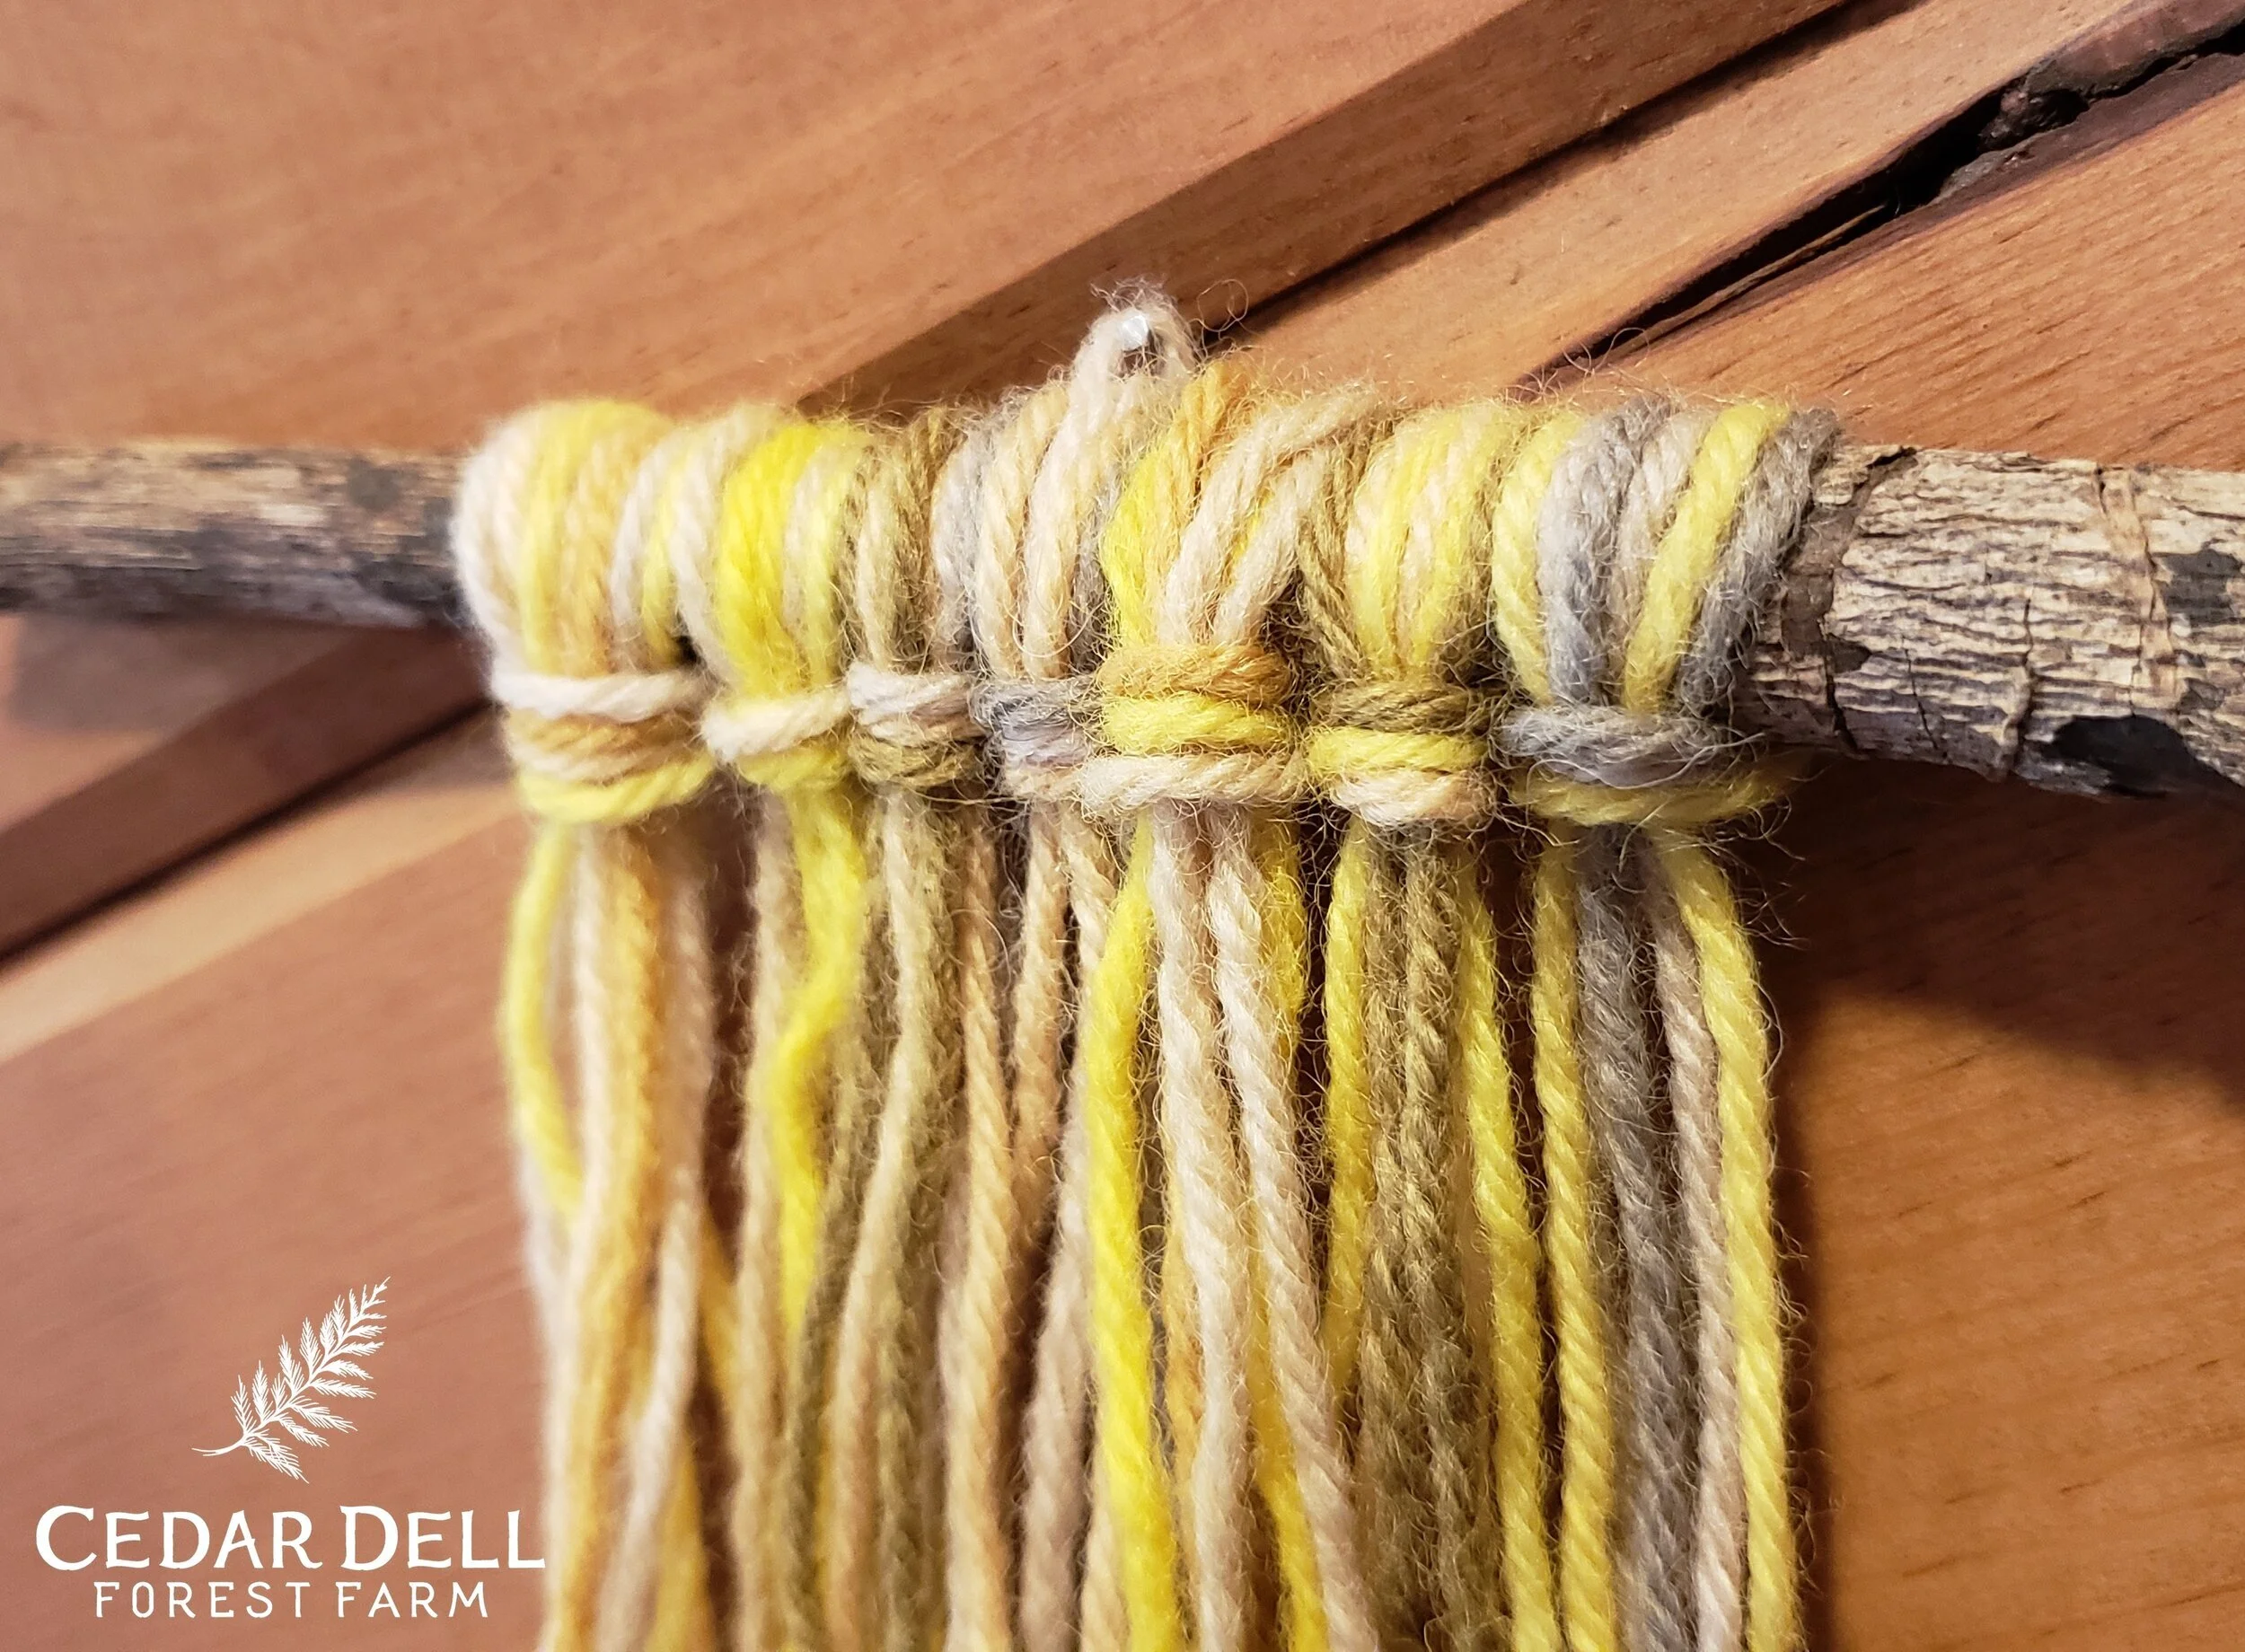
Everyone got a long length of each color and they made some beautiful wall hangings!